
Not the catalogue version. This is the workshop version — the actual process of how climbing sticks are made, from raw rail to tested product.
Every folding climbing stick you see listed online went through the same invisible journey: a material decision, a first prototype that wasn’t quite right, a revision, another revision, tooling, and finally a batch you’d put your full weight on.
Most suppliers can’t show you that journey. We documented ours. Every photo below was taken in our own factory during the development of our folding climbing stick — raw rails, machined prototypes, the versions that taught us something, production tooling, and the finished product as it ships.
If you hunt from a saddle, this is how to judge any stick you buy. If you run a brand, this is what your supplier’s development process should look like.
Section 1 — Material Selection: The Decision That Comes Before Design
Development starts with material, not geometry. Choose the material badly and no amount of good design saves the product.
6061-T6 is where we landed: a heat-treated aluminum alloy that carries structural-grade strength while staying light enough to pack in, and that machines and welds predictably. It is the standard for climbing sticks for a reason.
Three alternatives get rejected in this category, usually to lower the price:
- Steel. Strong and cheap, but the weight penalty rules it out for mobile hunting — and weight is the whole point of this category.
- Non-heat-treated aluminum. Cheaper to buy. Under shock load it bends instead of recovering, and a stick that bends once is done.
- Thinner walls. The most common cost cut, and the most dangerous one. It reduces weight and cost on the spec sheet by reducing exactly the safety margin you can’t afford to lose.
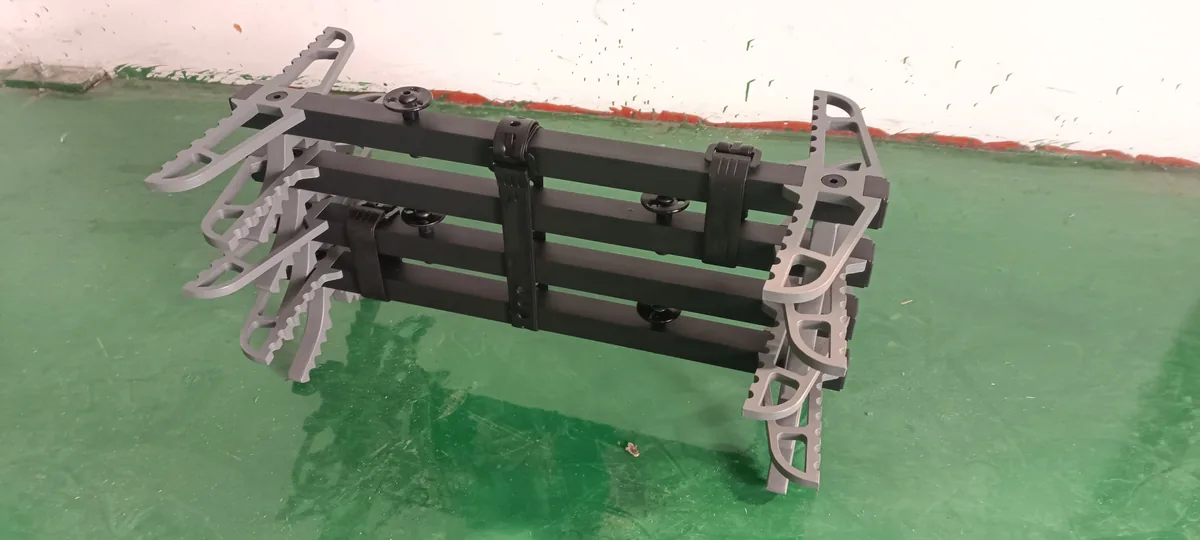
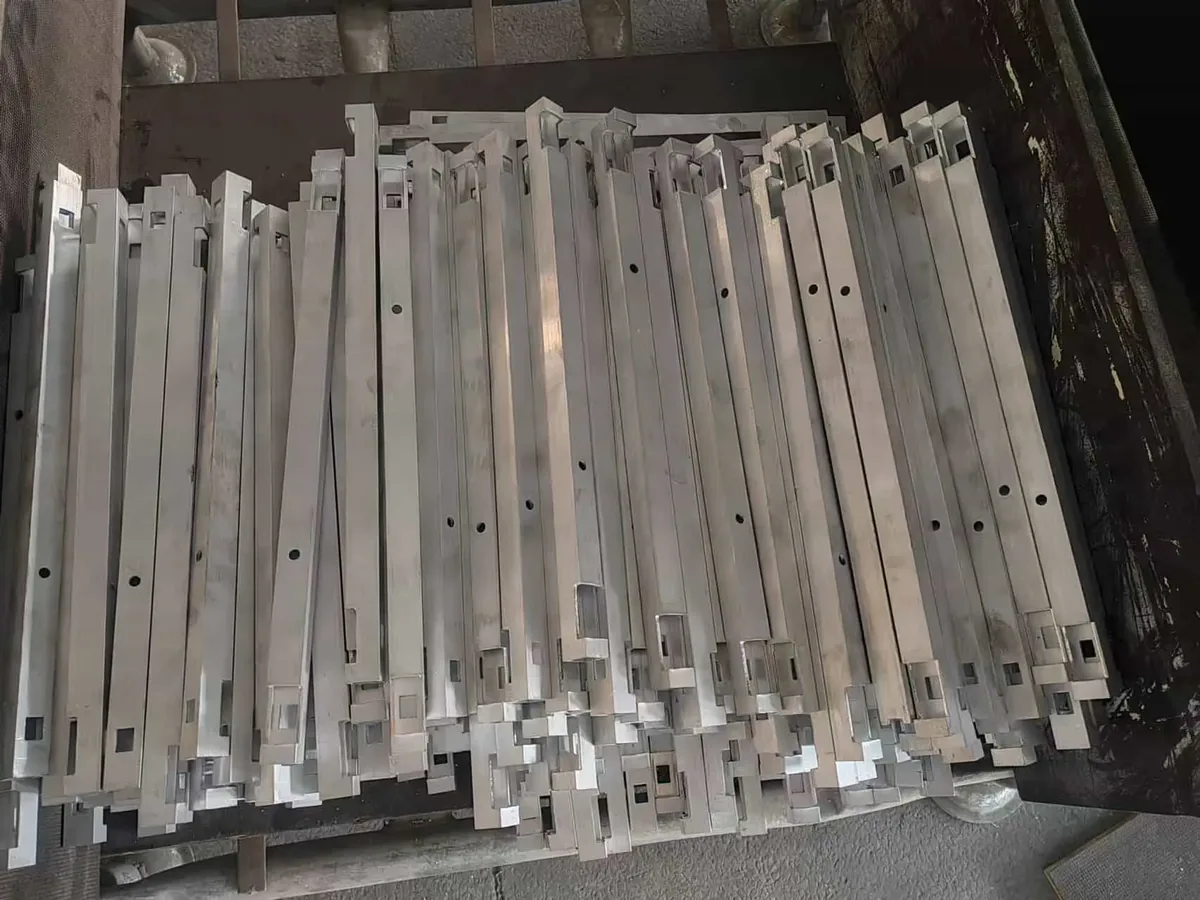
Below: the raw rails at our factory, before a single bracket existed.
Section 2 — First Brackets: From Flat Plate to a Working Part
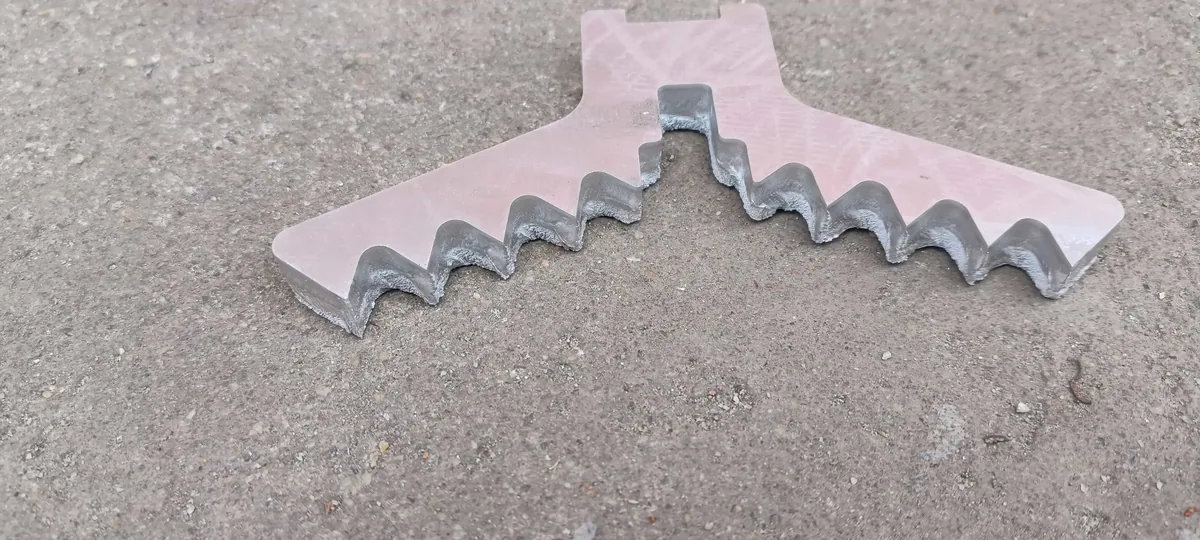
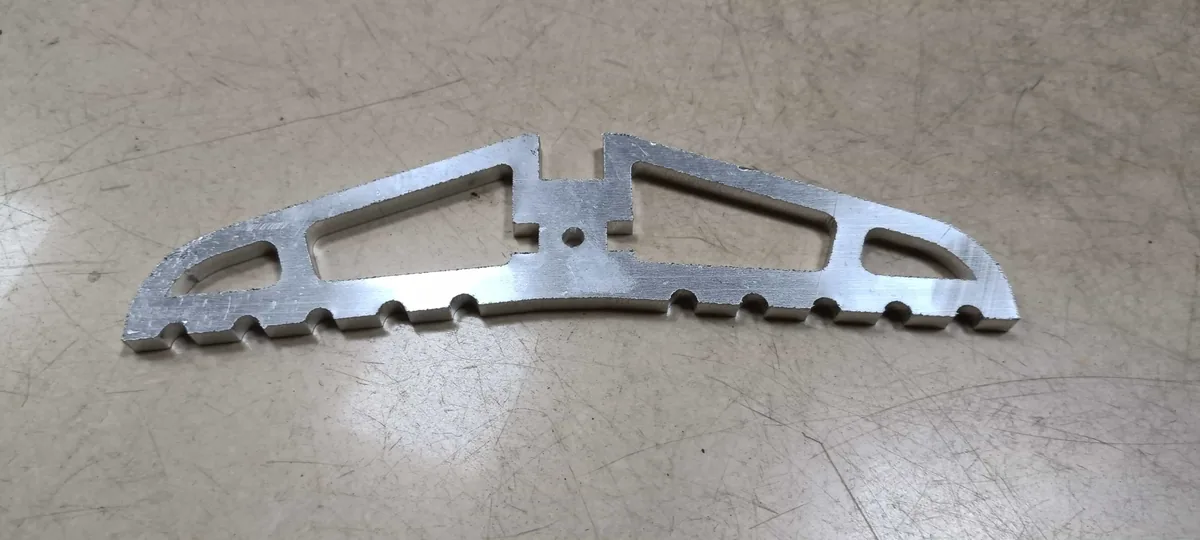
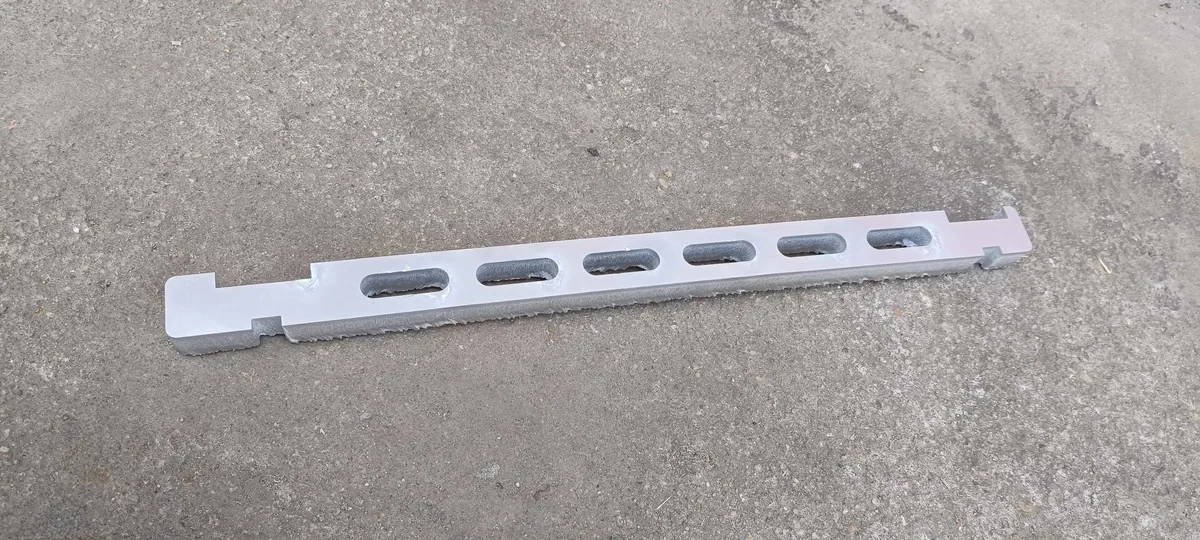
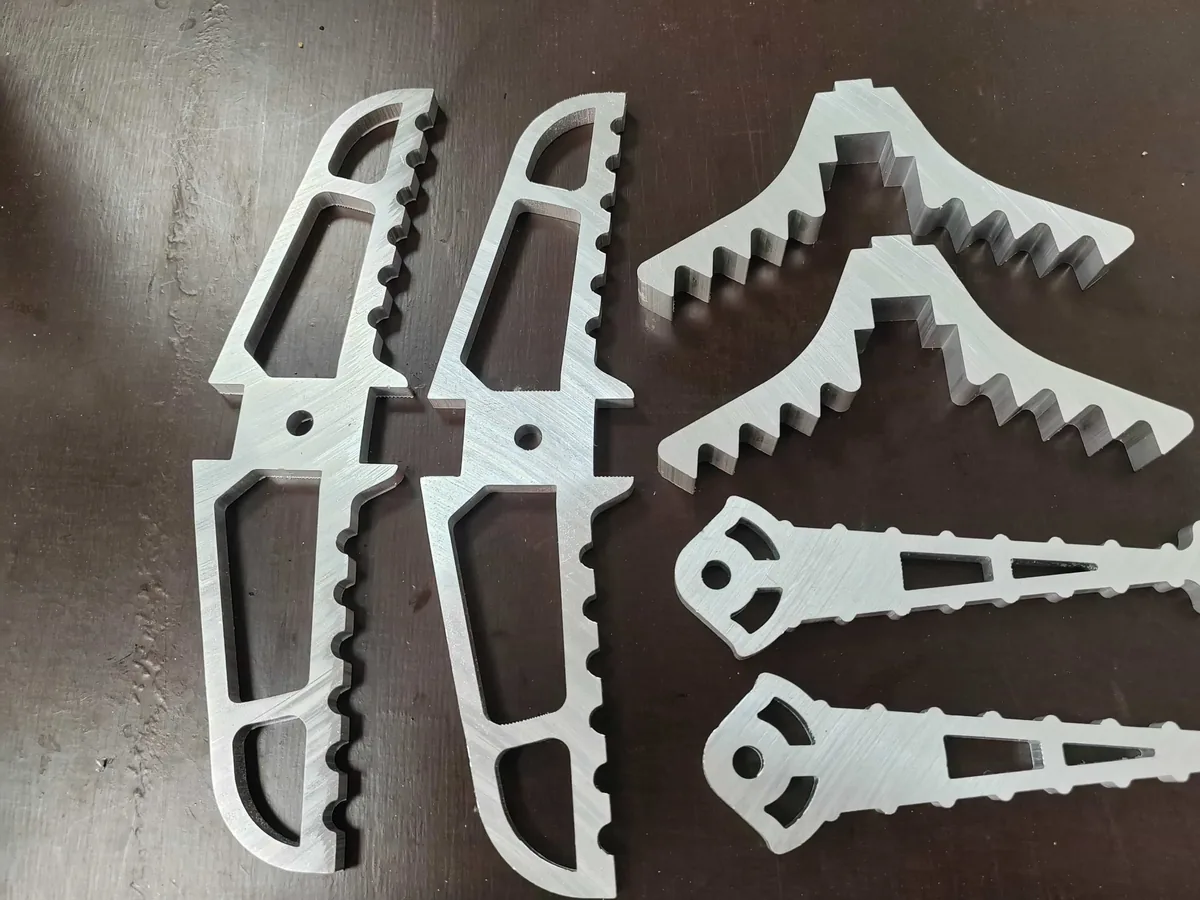
The step brackets begin as flat plate. Laser cutting turns each sheet into bracket blanks — including the serrated step profile that gives a boot something to bite on, even wet or iced.
Two details matter more than cutting speed:
- Edge quality. A clean laser edge means no stress risers where a crack could start.
- Weight-saving slots. The oval cutouts in the rails aren’t decoration. Every slot removes grams from a product that gets carried up a hill — but each one also removes stiffness, so each one is sized against load testing, not against looks.
And here is what tolerances really mean on a climbing stick. A bracket hole that sits slightly off-centre will still assemble in the factory and still clamp onto a tree. Nobody sees it in an unboxing video. But under load, that play becomes movement, and movement becomes wear — the stick that feels vague in its second season. We hold tolerances on the critical interfaces against the drawing, not against the previous batch.
Section 3 — The Prototype Stage: Version After Version
This is the part most factory websites never show.
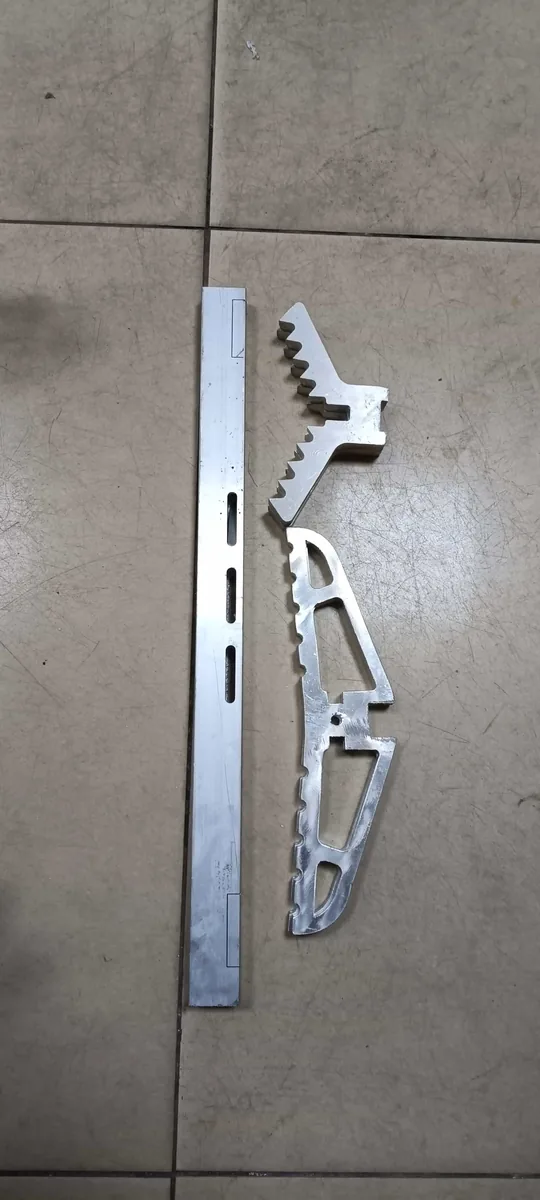
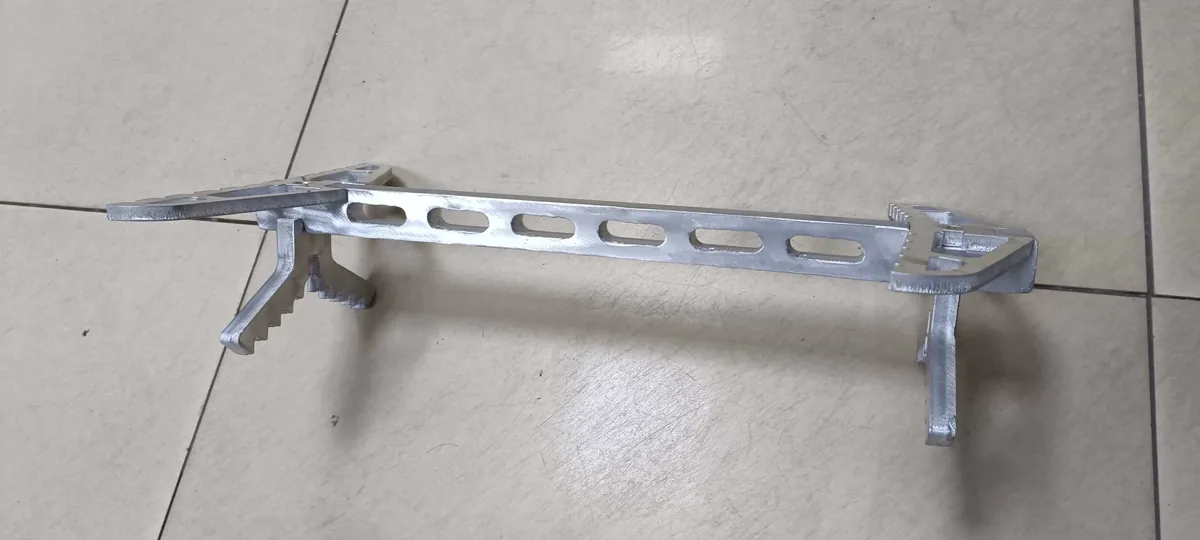
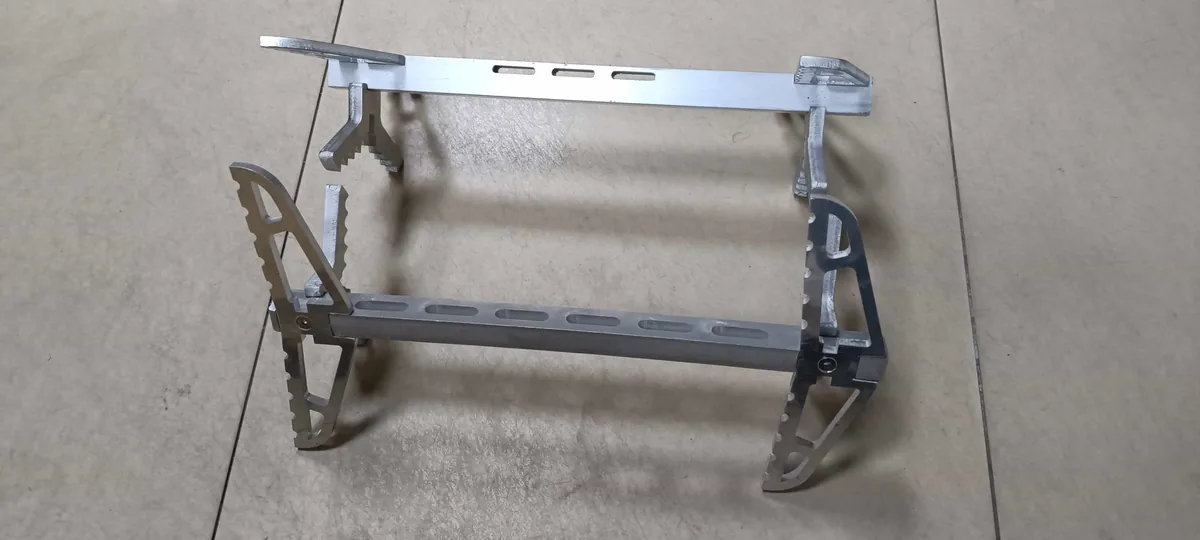
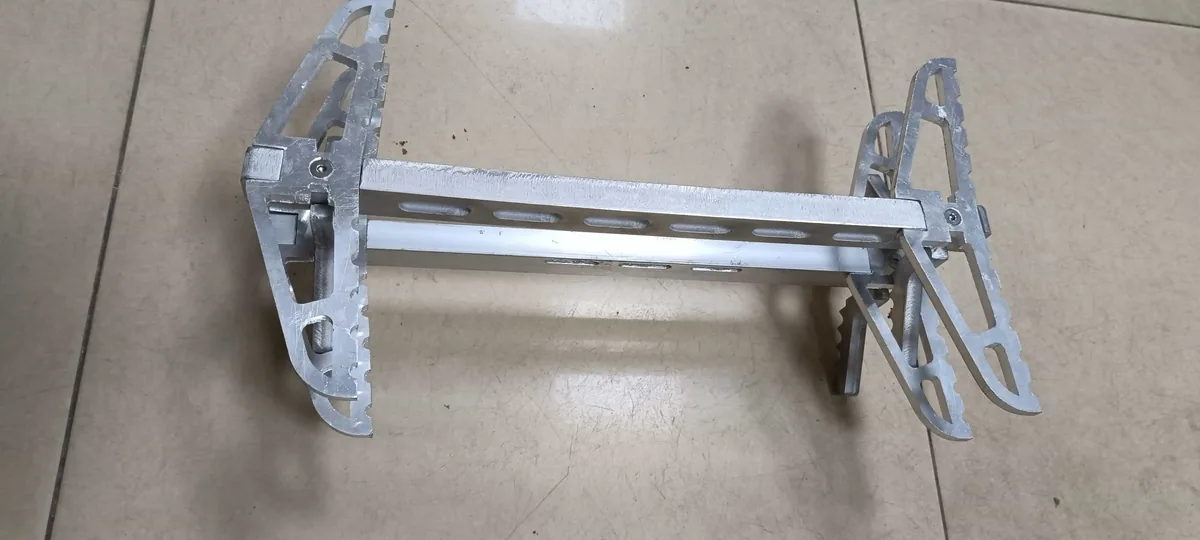
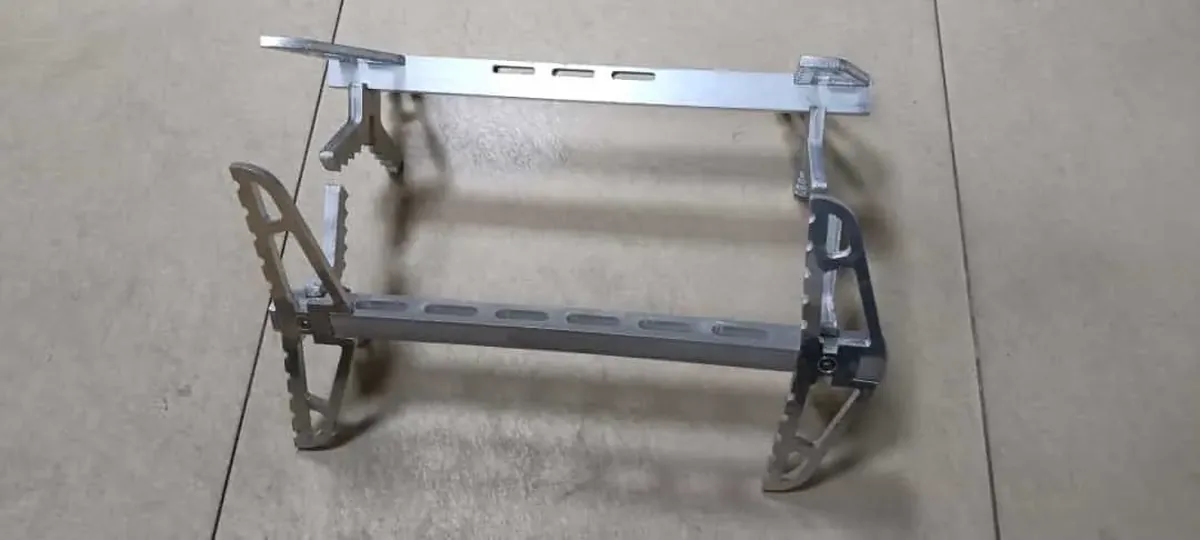
Before a single piece of production tooling was cut, the design went through working prototypes — brackets machined one by one from solid, assembled, clamped to a tree, folded, carried, and then taken apart to see what the tree taught us. Machining prototypes one at a time is slow and expensive. That’s exactly what prototypes are for: finding every problem the cheap way, before tooling makes the expensive way permanent.
The clearest example is the connecting tube. Our earliest version was machined out of solid aluminum plate — it worked, but it was heavy, it wasted material, and producing it one piece at a time was slow. We redesigned it around aluminum tube instead: the same structural job, done with far less material, at a lower weight, with a wall thickness that stays consistent from one piece to the next. That single decision moved the whole design from “a prototype that works” to something worth investing tooling in.
That is what a revision looks like in practice — not a change in styling, a change in how the part is made. Take that logic across the whole prototype stage — the connecting tube, the folding geometry, the step profile, the packed thickness — and you get the difference between a drawing and a product you can put your weight on.
Each version was built, then tested against the last one: lighter to carry, thinner in the pack, sharper under a wet boot. Only the frame that survived everything we did to it was approved for tooling.
The photos show those stages: the first assembly, the folding hinge iterations, and the frame that finally passed.
Section 4 — Design Locked: From One-Off Machining to Production
Once the prototype frame survived testing, the design was frozen and tooling went to work.
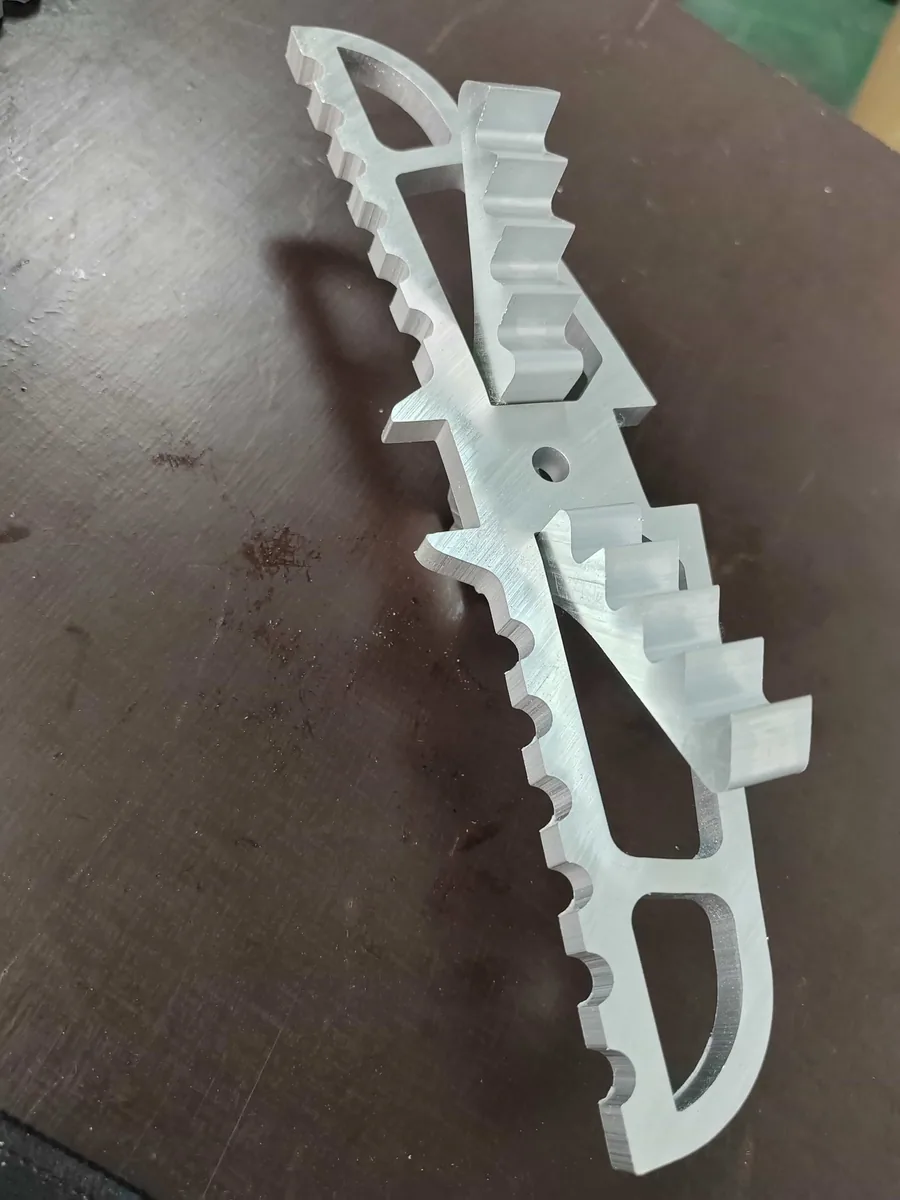
This is the step that changes the economics. In prototypes, brackets were machined one at a time. In production, the vertical clamps and the foot-step brackets are extruded from custom aluminum dies built specifically for this design — aluminum profiles drawn through tooling made for this part. Extrusion gives us a surface that is noticeably smoother, cleaner and more finely finished than a one-off machined prototype, at a fraction of the piece cost. The connecting tubes are produced with precision tooling to match, so the interfaces that carry the load fit the way they were designed to fit — not the way they happened to come off a machine.
The photos below are the first production components off the line: brackets in production quantities, and rails produced to the frozen drawing. This is also where our fish-shaped double-step bracket — patent-pending — landed as the result of the whole prototype stage: not a concept render, a production part.
Prototype to production, under one roof. Most suppliers split that across three factories; every handover is a place where tolerances and intent get lost.
Section 5 — The First Production Batch
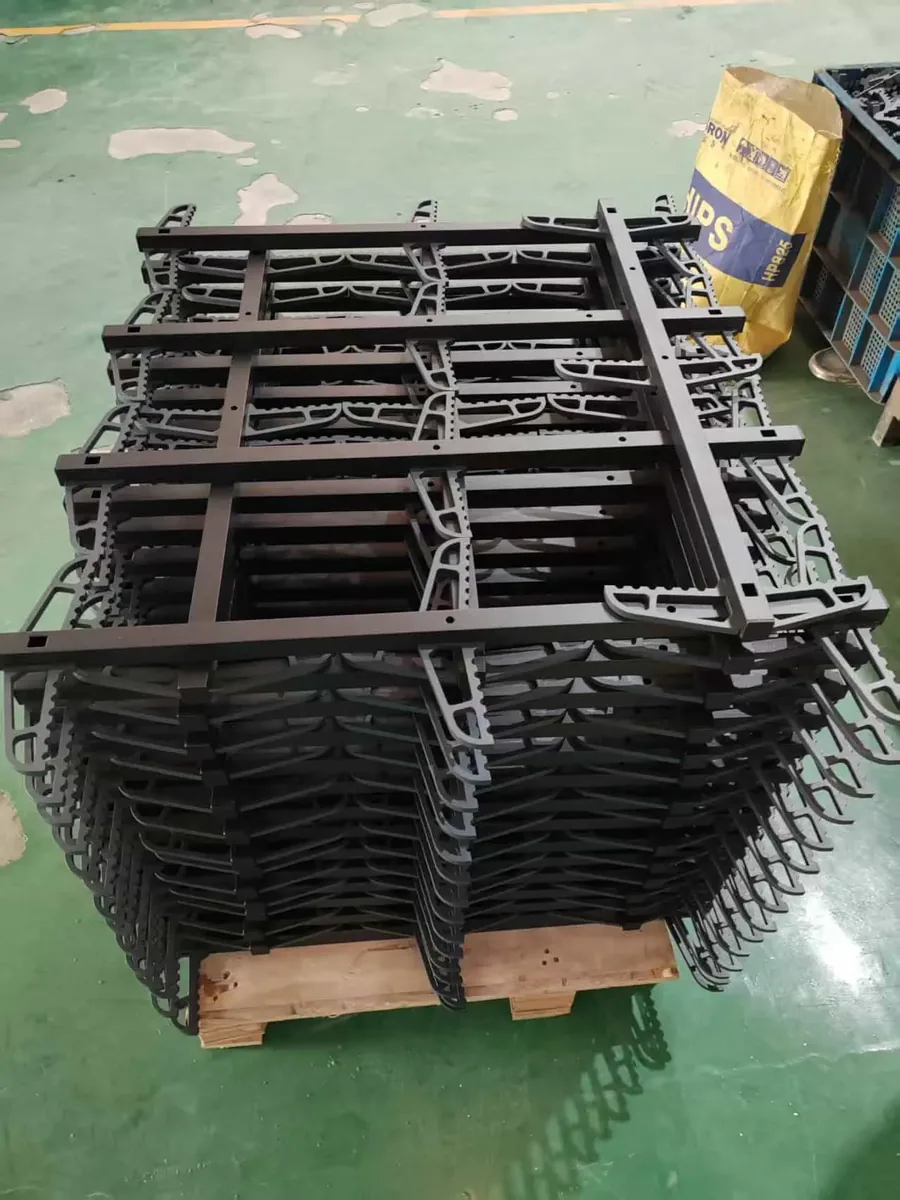
And this is where the whole journey lands: the photo below is a production batch — the same design that started as a raw rail and a machined bracket, now powder-coated, assembled and stacked in quantities a brand can actually list, sell and reorder.
The finish isn’t cosmetic, by the way. Each frame goes through surface preparation and then powder coating: the powder is sprayed on electrostatically and cured in an oven, so it fuses into a hard, even film bonded to the aluminum rather than dried on top of it like wet paint. That is real corrosion resistance for a product that lives in rain, snow and mud, and a coating that is tougher and more even than a sprayed liquid paint — it doesn’t chip off the way wet paint does.
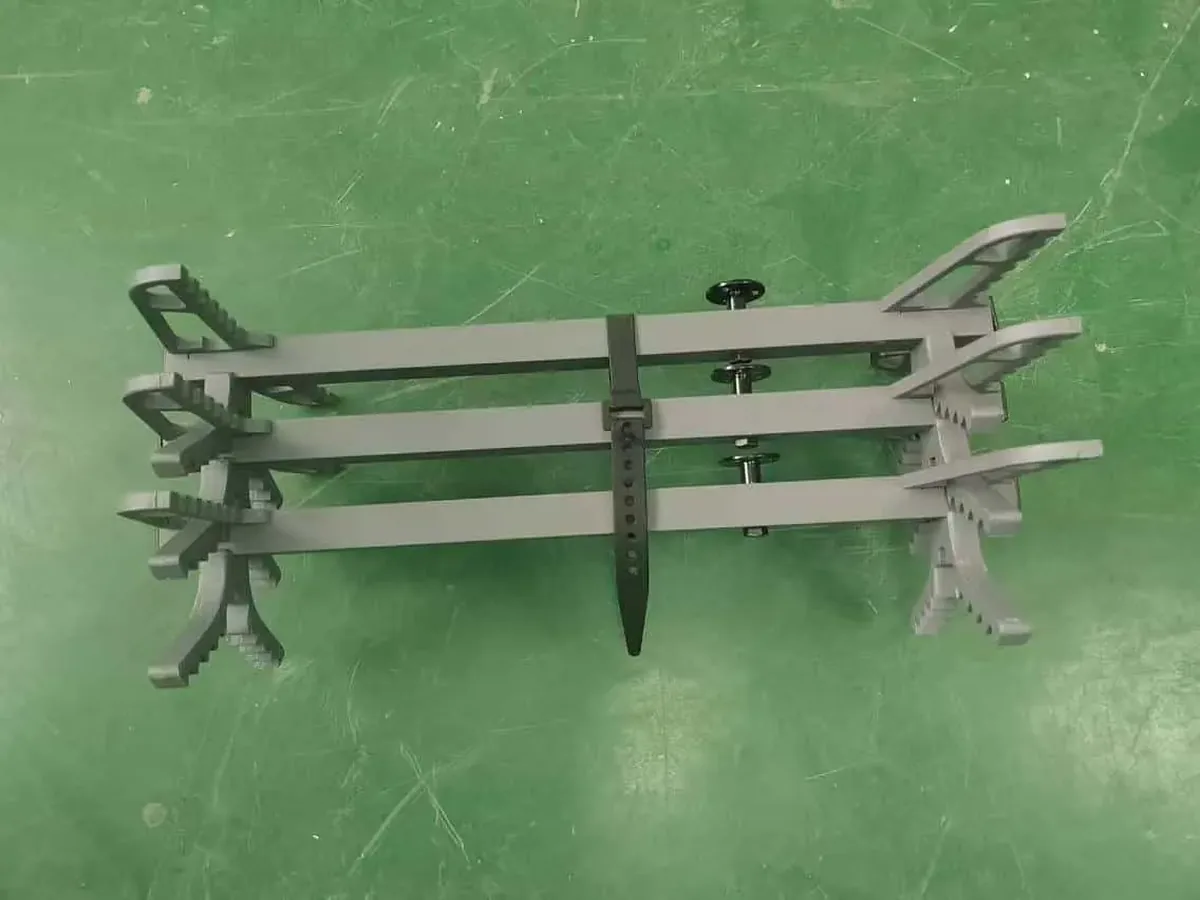
You’ll notice two finishes in these photos: a black batch and a gray finished product. They are the same stick in two colorways. Powder coating runs in batches by color, so these are two separate production runs — same design, same tooling, same testing, different finish. The packing was also set up differently for each so our customer could review the presentation before a single carton shipped.
Section 6 — The Confirmed Product, and How It Ships
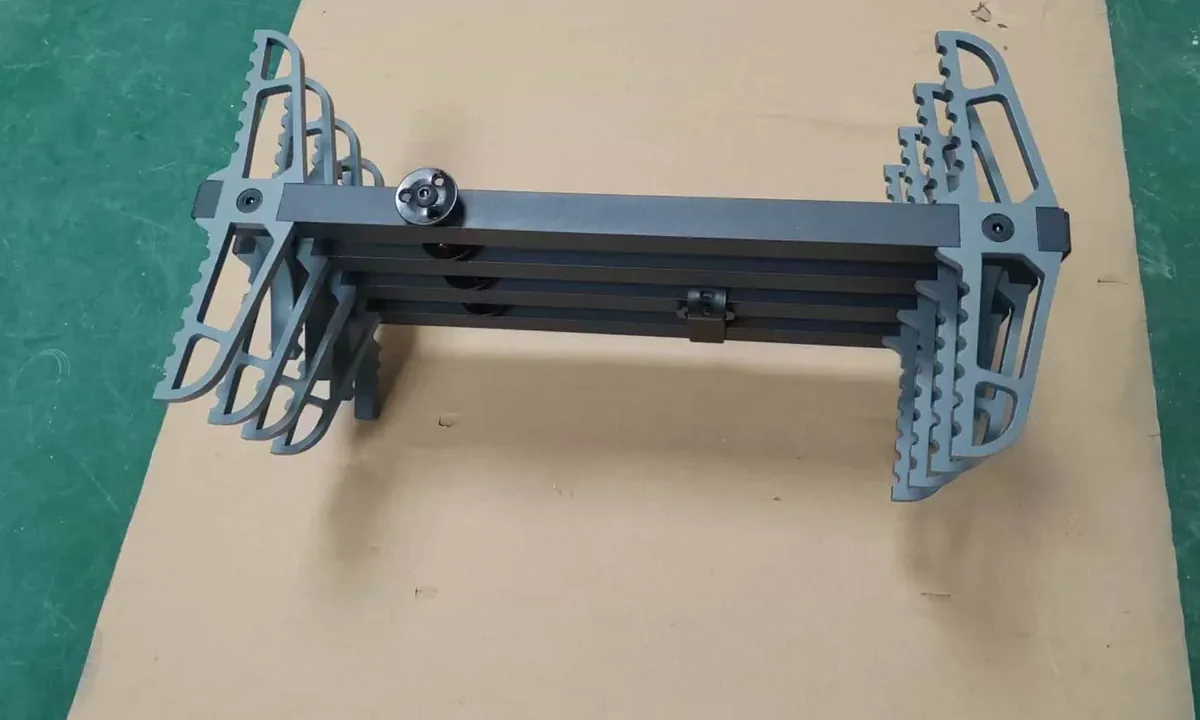
The final confirmed product, shown folded with its carrying strap and as it goes into the box — because the last step of development is making sure the buyer opens the container to exactly what left the workshop.
Every finished unit is inspected — not a sample — and carries a traceability code linked to its production batch. If a question ever comes up in the field, we can pull the batch records and test data behind that specific unit. Packing follows a fixed diagram: components fixed layer by layer, hardware bagged and labeled separately.
Section 7 — Load Testing: What It’s Rated For, and What It Actually Takes
A climbing stick is rated at a working load — for our models, 300 lb (136 kg). That figure is not the point where the product gives up. It’s the load it carries with a deliberate safety margin above it.
To know the real margin, you have to test to failure: load the assembled stick until something gives, and record where it failed and at what load. Testing only up to the rated number tells you nothing about what sits above it.
Our protocol:
- Every production batch: static load testing against the rated capacity.
- Development and first article: load-to-failure testing to document the actual failure point.
- Failures are recorded by location — tube, weld, bracket or hardware — because each one points to a different fix.
▶ Static load test footage: watch this space — video being edited.
How Climbing Sticks Are Made: What It Means for Brands and Hunters
If you’re a brand, the checklist to run against any supplier is now visible — this is how climbing sticks are made when the process is done properly:
- Do they show you the development, or only the finished product?
- Did the product go through prototyping, or go straight to tooling?
- Do they test every batch, or just the first article?
- Can they take you from prototype to production on one line?
How we work with brands:
- MOQ from 50 units
- Prototypes in around 30 days
- Tooling co-investment for new models
- NDA before any design discussion
- In-house factory and industrial design team
Send us a sketch, a concept or a sample — you’ll get a technical response within 48 hours.
→ Our climbing stick lineup
→ Two Double-Step Climbing Sticks
→ Adjustable Climbing Sticks
→ Custom product development
And if you’re a hunter: next time you compare sticks, ask the brand one question — “Was this batch load tested?” The answer tells you everything.
Frequently Asked Questions
Q: How long does it take to develop a new climbing stick?
A: A tested prototype typically takes around 30 days from a confirmed concept, followed by design refinement and first-article testing before production.
Q: What load are your climbing sticks rated for?
A: Most models are rated at 300 lb (136 kg) working load, verified by static load testing on every production batch.
Q: Are your climbing sticks tested to failure?
A: Yes — load-to-failure testing during development documents the actual failure point, so the margin above the rated load is a measured number rather than an assumption.
Q: What material are your climbing sticks made from?
A: 6061-T6 aluminum rails, with production brackets and clamps extruded from custom aluminum dies and connecting tubes made with precision tooling.
Q: Do you have proprietary designs?
A: Yes — our fish-shaped double-step climbing stick bracket is patent-pending, and we co-develop new models with brand partners under NDA.
Q: What is your MOQ for OEM climbing sticks?
A: MOQ starts at 50 units, with prototypes in around 30 days.